
Watch first: the whole journey in three minutes. Then follow the steps below.
Who this is for
This guide is for someone who leads a group through a course: in a church, a home, a school or anywhere else.
You show the videos and lead the discussion. Your students follow on printed handouts. At the end, each student receives a certificate.
Your students do not need an email address, a phone or an account. Only you, the teacher, use the website. You type in their names, and nothing else.
What you need
- Your own account on BibleHelp (it is free).
- A way to show the videos to your group: a phone, a laptop, or a screen.
- A printer, or a place where you can print, for the handouts and the certificates.
The five things you will do
- Enrol in the course yourself.
- Create your class.
- Add your students’ names.
- Print the handouts and teach the course.
- Print the certificates.
Step 1. Enrol in the course yourself
First enrol in the course you want to teach, exactly as a learner does. See the guide How to take a course on BibleHelp.
Important: you can print your students’ certificates only when you have completed the course yourself on the site, including the quiz at the end of each study.
You do not have to finish before you begin teaching. Many teachers work through the course with their class, marking each part complete and doing the quizzes together.
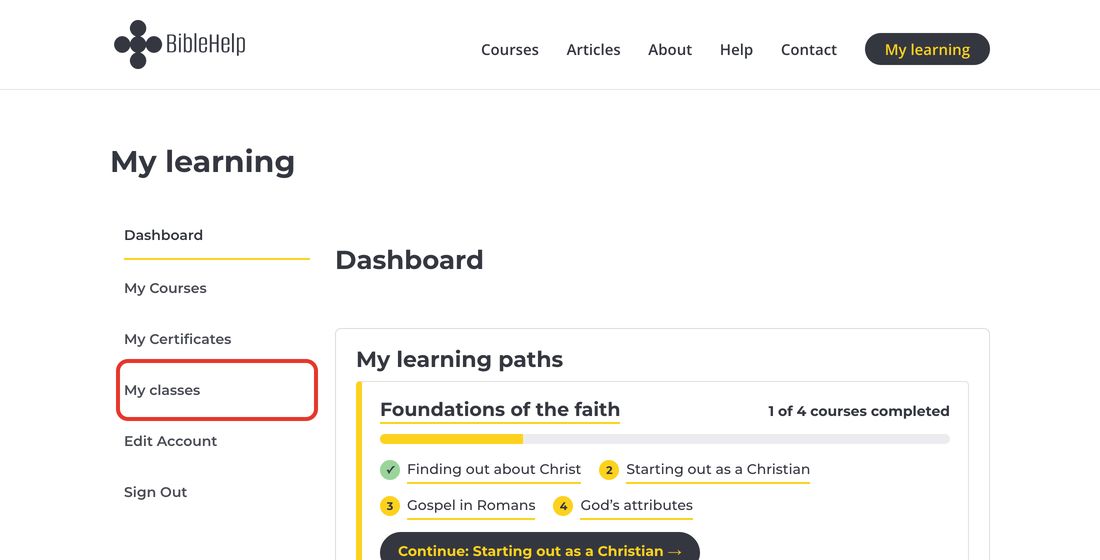
Step 2. Open “My classes”
- Log in.
- Click My learning at the top of the page.
- Click My classes.
Step 3. Create your class
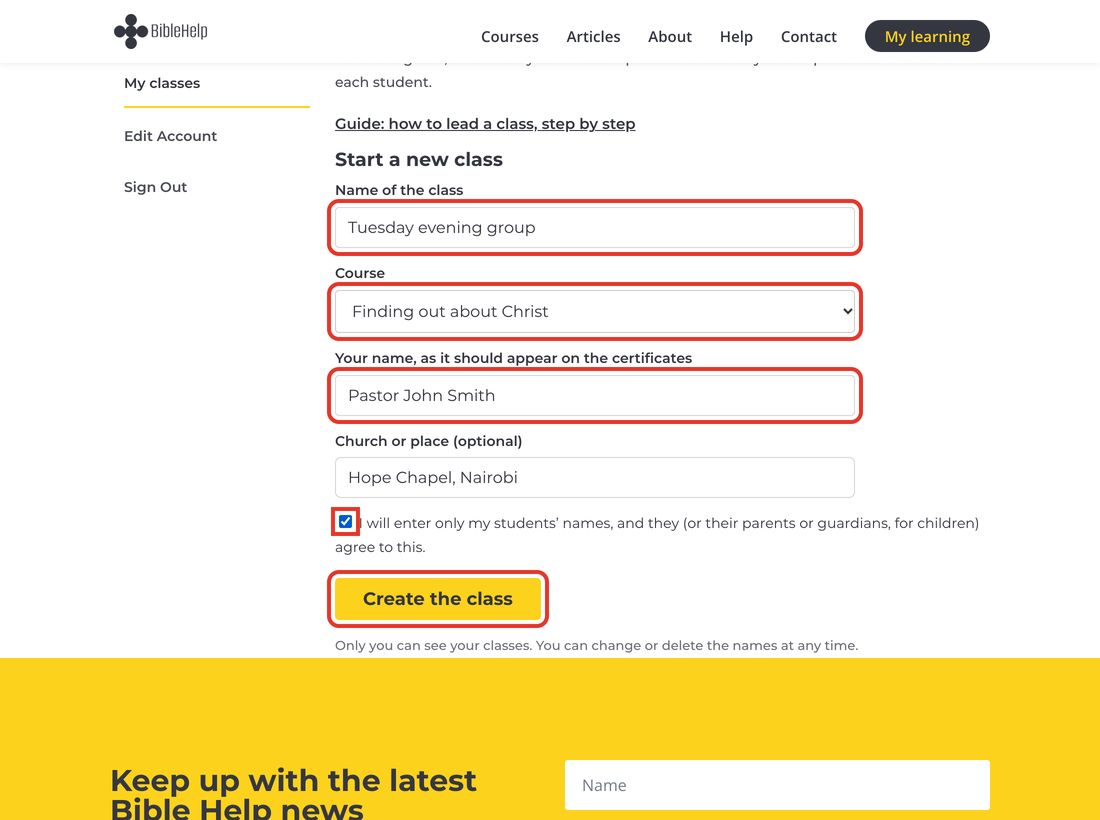
Under Start a new class, fill in:
- Name of the class: any name that helps you, for example “Tuesday evening group”.
- Course: choose the course you will teach.
- Your name, as it should appear on the certificates: for example “Pastor John Smith”.
- Church or place: you may leave this empty. If you fill it in, it is printed on the certificates.
Then tick the box. By ticking it you confirm that your students agree to their names being entered. For a child, a parent or guardian must agree.
Click Create the class.
Step 4. Add your students’ names
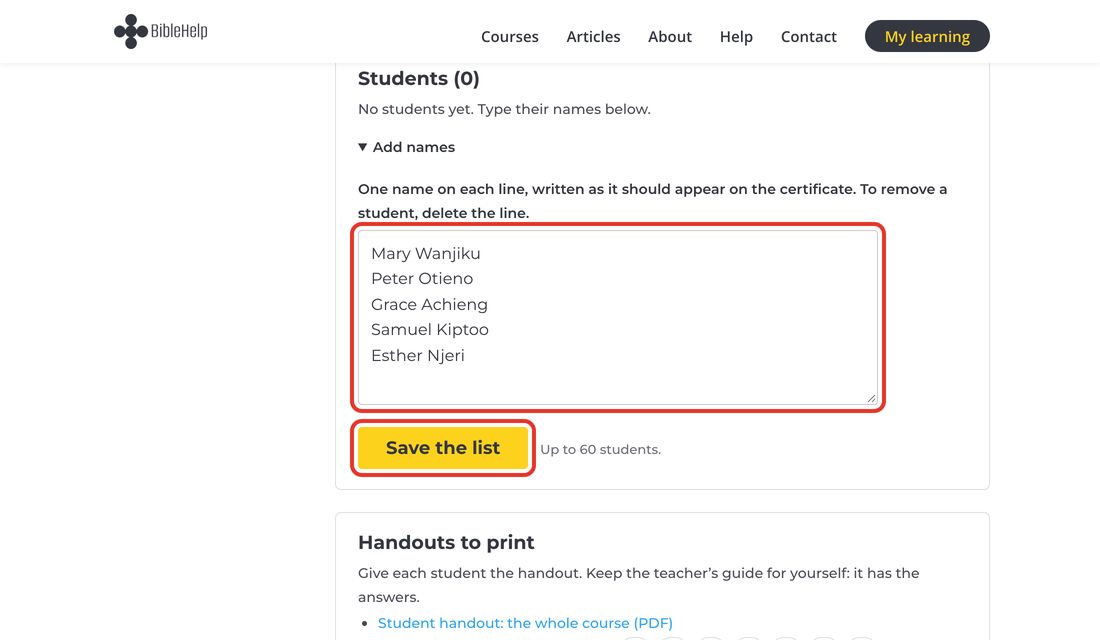
Type your students’ names in the box.
- One name on each line.
- Write each name the way it should appear on the certificate.
Then click Save the list. A class can have up to 60 students.
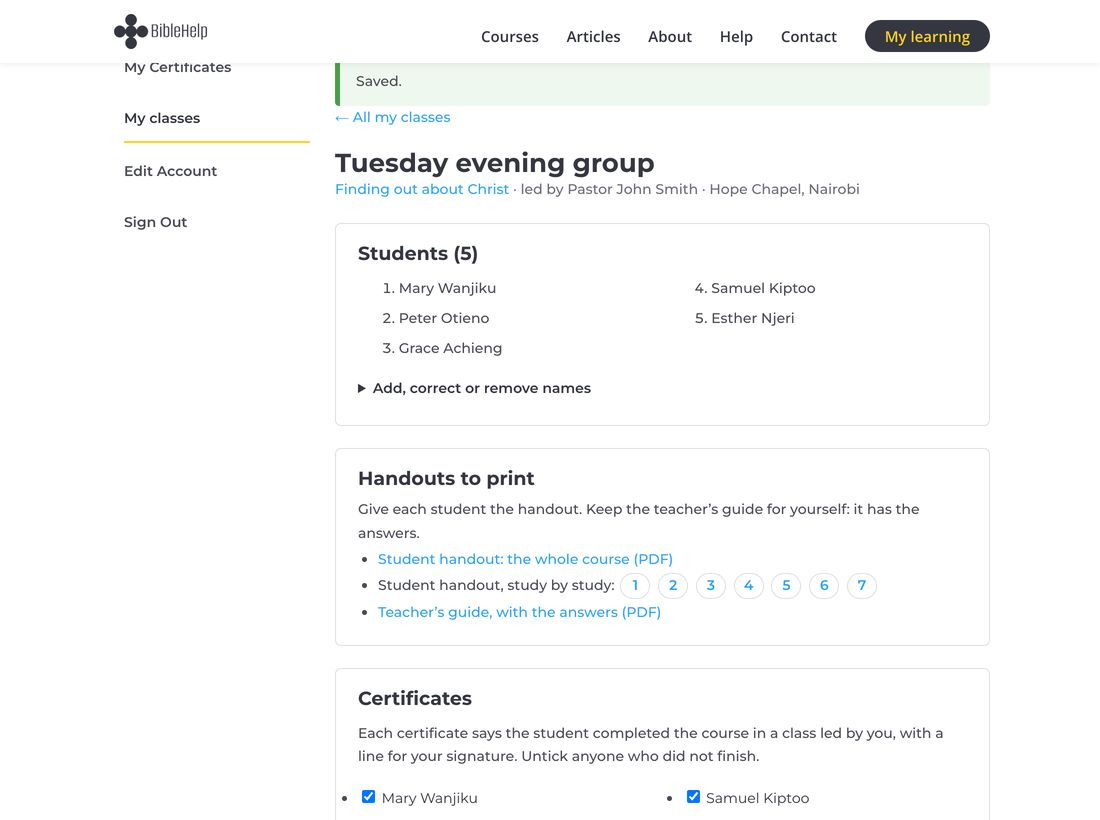
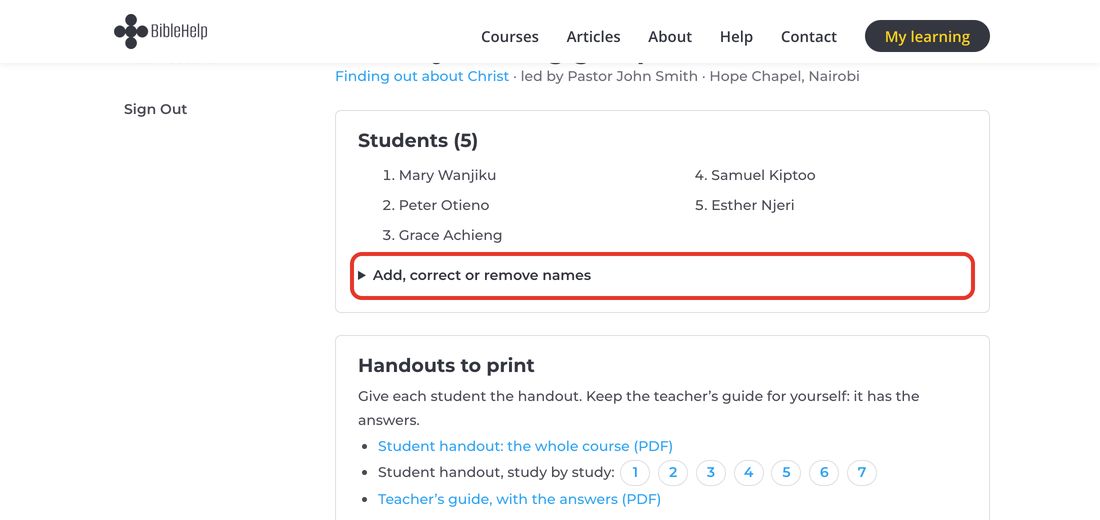
Your class now looks like this:
To add, correct or remove a name later
Click Add, correct or remove names, change the list, and click Save the list again. To remove a student, delete that line.
Step 5. Print the handouts
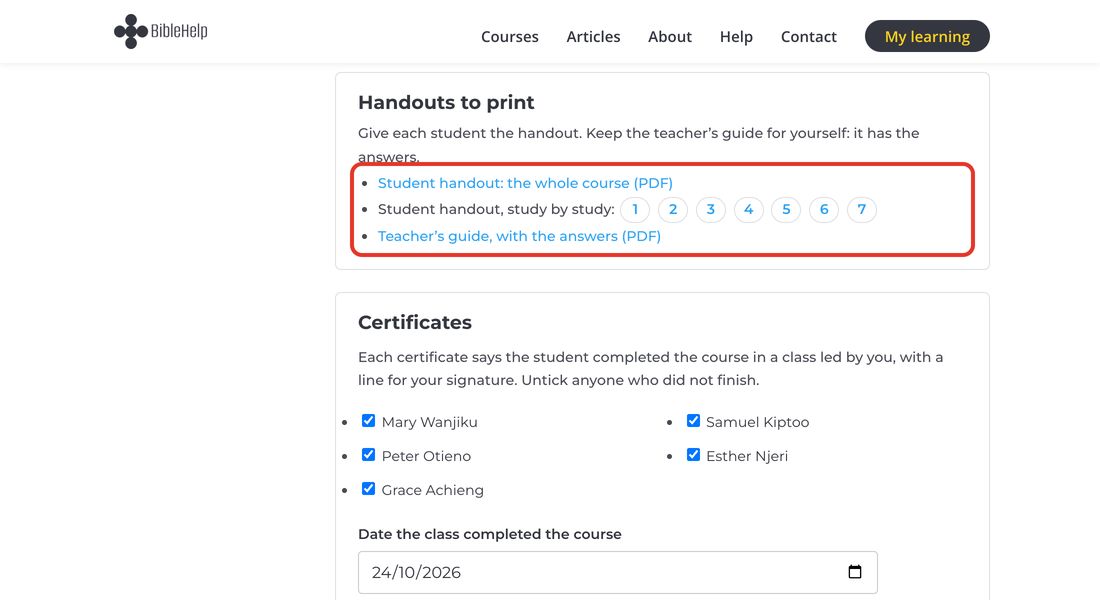
Under Handouts to print you will find:
- Student handout: the whole course — everything in one file;
- Student handout, study by study — click a number to get one study at a time;
- Teacher’s guide, with the answers — this one is for you. Do not hand it out.
Click one to open it, then print it. Print one student handout for each student.
Step 6. Teach the course
For each study:
- Open the course on the site and show the video of each part.
- Read the Bible passages together.
- Talk about the questions. Your teacher’s guide has the answers.
- Click Mark Complete after each part, and do the quiz together at the end of the study.
Step 7. Print the certificates
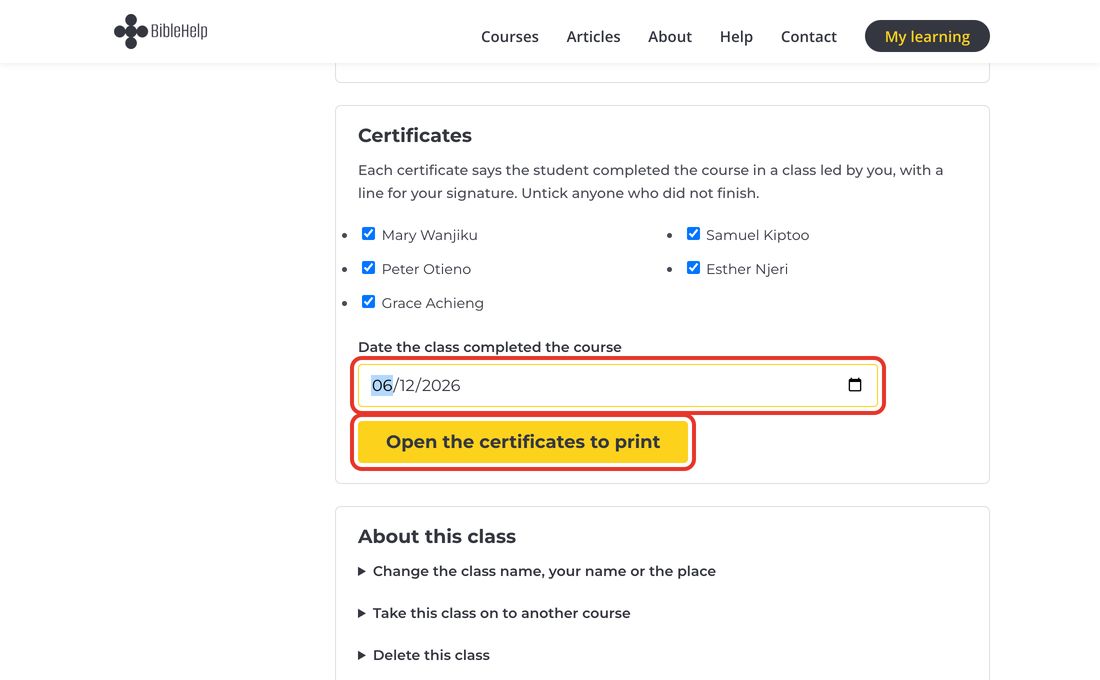
When the class has finished the course, open your class and go to Certificates.
- Every student is ticked. Untick anyone who did not finish.
- Choose the date the class completed the course.
- Click Open the certificates to print.
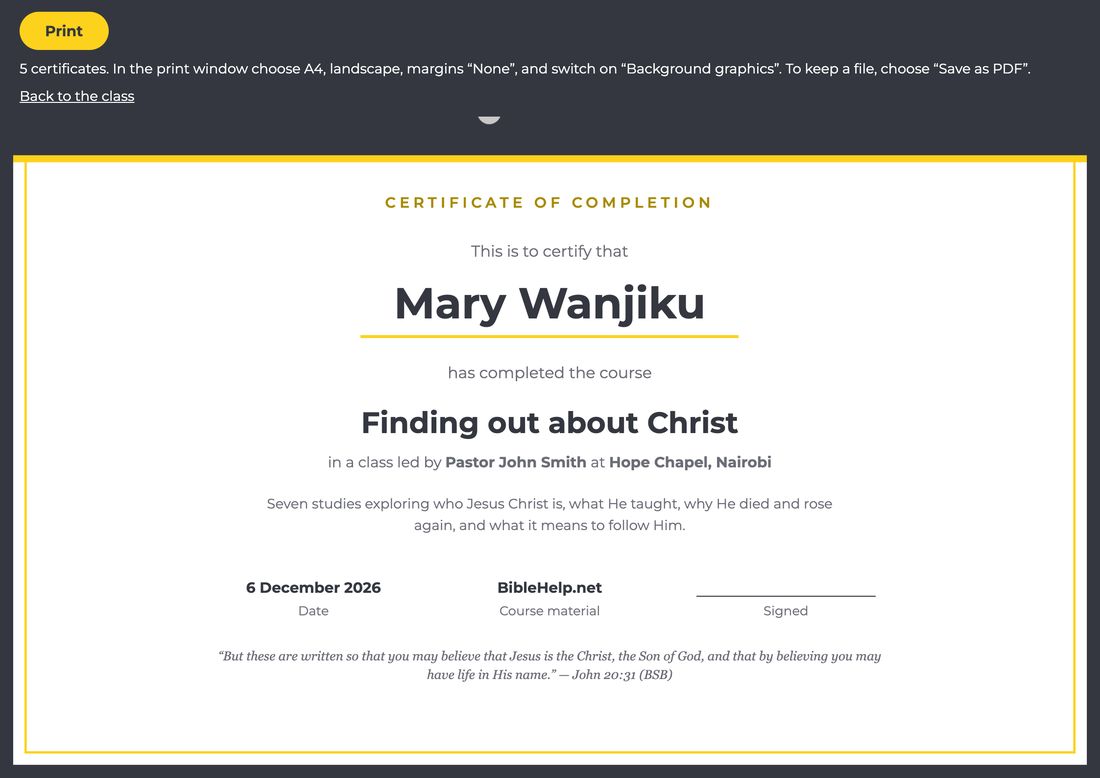
A new page opens with one certificate for each student.
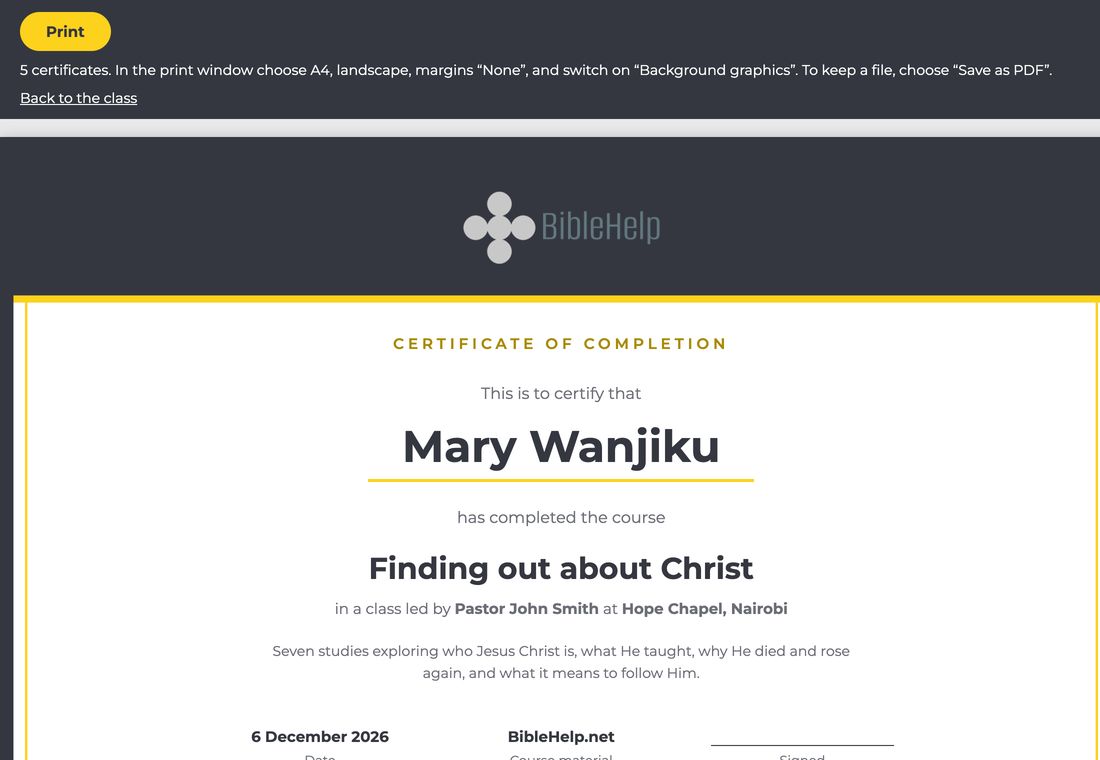
To print them, use your browser’s Print. In the print window choose:
- paper size A4;
- Landscape (the paper lying on its side);
- margins None;
- Background graphics switched on.
To keep a file instead, choose Save as PDF.
Each certificate has a line for your signature. Sign them before you give them out.
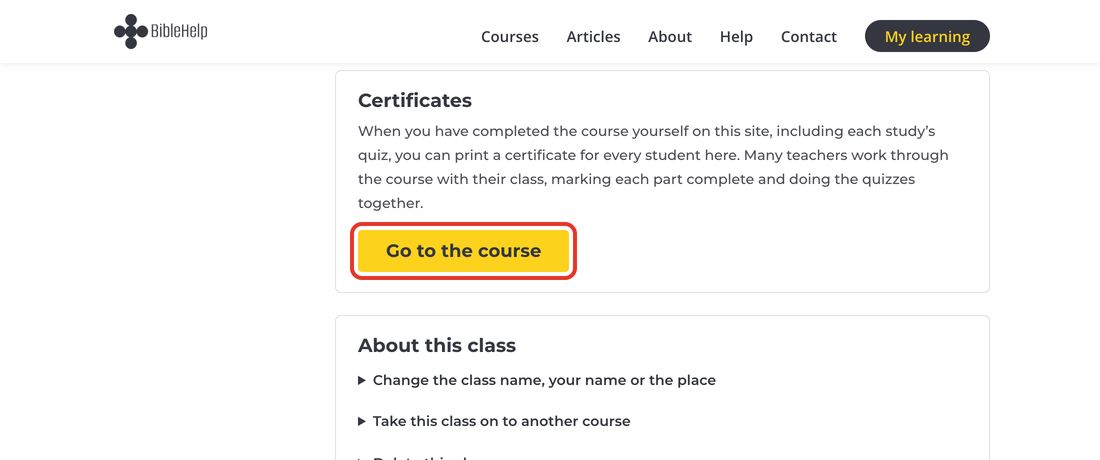
If you see “Go to the course” where the certificates should be
This means you have not yet completed the course yourself on the site. Click Go to the course, finish every part and every quiz, then come back to your class.
Step 8. Going on to another course
When your class has finished one course, you can take the same students on to the next.
Open your class and, under About this class, click Take this class on to another course. Choose the course and click Make the new class. The new class has the same students.
Remember that you will need to complete that course too before you can print its certificates.
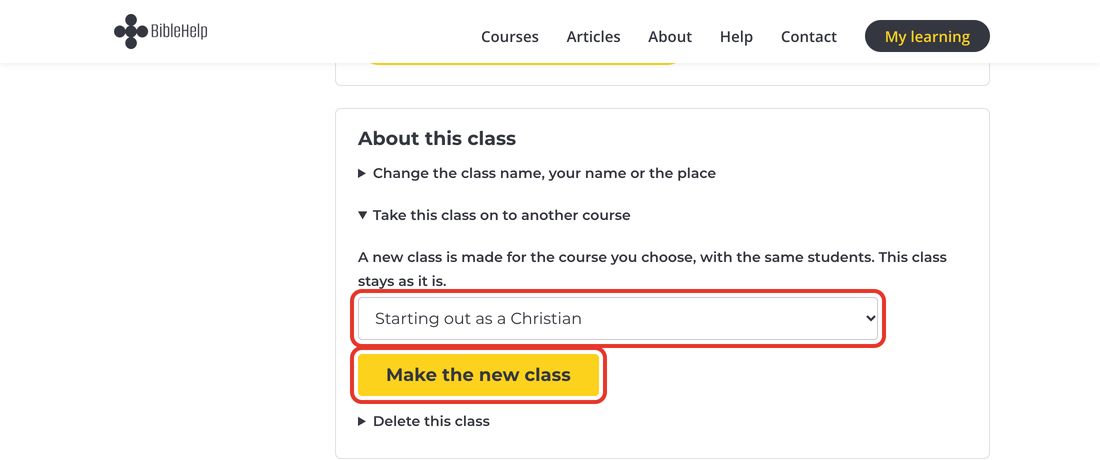
In the same place you can change the class name, your name or the place, or delete the class.
Your students’ privacy
- Only you can see your classes.
- We keep your students’ names and nothing else about them.
- You can correct or delete a name, or delete a whole class, at any time.
If you need help
Click Contact at the top of any page and send us a message. We will reply by email.
See also: How to take a course on BibleHelp